Probable plans for the Duracraft Brookfield:
I spent some time tonight with wood scraps making temporary mini rooms to see how my furniture and chandeliers are going to look together. This is just a rough idea and the ceiling is way too low but you do get the effect of a room.
The bathroom is going to be contemporary/romantic. Old fashioned tub but with chrome trim rather than bra

ss, crystal chandelier but modern lights at the carved mirror, contemporary bowl sink and round vanity...I think it's going to look really pretty. I have a cream background with red flowers wallpaper in mind.
I really like the colors of the living room chandelier with the furniture. The green matches the interior of the hutch. This will look much better when there's a bit more clearance be

tween light and flowers, lol. This room will have cream and gold striped wallpaper with a coordinating border and maybe a carved effect wainscot. I'm still thinking about that. Probably wood floor with an area rug.
The kitchen will be papered in a neutral check pattern with a fruit border. I think I'm going to do the cupboards in a sheer pearl finish with dark granite look counter. The floor will be terra cotta tile. All of this is open to change since I don't even have the kit yet but these are the plans in my head right now. I almost always have most of the furniture made and the decorating figured out before I even start building. The project goes really quickly then since I've already made a lot of the decisions. At this point, I have no idea how I'm going to finish the exterior. I also am going to want to do something different with the stairs as it is an ugly opened back thing. Looks more like basement steps than the main staircase.


 Today's been a catch up day for household chores. The laundry piled up while I was battling the flu! So I haven't gotten to any minis today but I would like share a country style bedroom I made a couple of years ago. The quilt on the bed was the inspiration for this room. My friend, Tina, in the UK designed the quilt as a kit and needed some testers. I got to test the kit and ended up with this beautiful quilt. Tina wanted photos and I didn't have a bed on hand so I threw this one together with craft sticks. I ended up really liking it so I put it together for real and gave it a whitewash finish. The rest of the furniture in the room was made and/or finished to match. The armoire is a Michael's hutch but the rest of the furnishings were made from scratch. The vanity chair is one of my favorite items. I made it without any pattern or kit. I just used what I had on hand and I'm really happy with the result. The rug was printed onto a T-shirt transfer and then ironed onto the back side of camel colored corduroy. That gave a wonderful texture to the rug. The wallpaper came from Jim's Printminis - the colors coordinate perfectly with Tina's quilt. This room is a favorite - it looks like a place I could really be comfortable. There's even a mug of coffee and a copy of my devotional Bible on the stool next to the upholstered chair.


 The tub was all originally the same red as the exterior. I've textured it a bit though and added the magnolias. The toilet was bright blue and had embossed hearts on the tank and lid. I sanded those off, painted the tub interior and toilet with a metallic pearl and then decoupaged magnolias on the tub, tank and lid. I used a silver paint pen to put a chrome finish on the hardware and feet of the tub.


 These are very easy to make. This tutorial is a variation of one I read online somewhere. I don't remember where so I can't give credit but I didn't come up with it on my own. I've combined that tutorial with some ideas from Jayne to make these. The first step is to paint a coffee filter, front and back, in the colors of choice. I used one filter to make both types of daffodils and the leaves. While the paint dries, cut 2 inch or so lengths of green florist wire. Make a tiny loop in the end of each stem and dip the loop in a bit of paint in whatever color you want the flower center to be. I used orange. Poke the stems into some foam or clay while the paint dries. By now the coffee filter is probably dry. I used regular office style hole punches - a circle punch for the cup and a star for the back petals. Using a small ball stylus, press the circle into a mouse pad to form it into a cup shape. Poke a straight pin into the center for inserting the wire stem. Put a bit of glue on the stem at the painted loop and slide the cup onto the stem and around the loop. Roll the cup between your thumb and finger to form it to size. Next poke the straight pin into the center of the star, slide it onto the wire into a small dab of glue. After the glue has set, thicken the stem at the base of the flower with a bit of green paint - I used forest green. While that dries, cut narrow leaf shapes from the green painted filter. Cut short lengths of florist wire, drag through the glue and attach the leaf shapes. Next I mixed tacky glue with my dirt (coffee grounds or dried tea) and put it in the potting container. Shorten the leaf stems so that the base of the leaf is at ground level and plant it. Bend the flower stems to a right angle about an eighth of an inch from the base of the flower, cut the stems to length and plant them. Arrange to your liking and let dry.
 The final version. I painted three coats of pure gold paint over the gesso and then rubbed a brown glaze into the gold after it had dried. I didn't have Bristol board or even mat board on hand so I used regular old glossy white on one side cardboard. I would prefer a heavier cardboard but this one is sturdy enough for a doll to sit on.


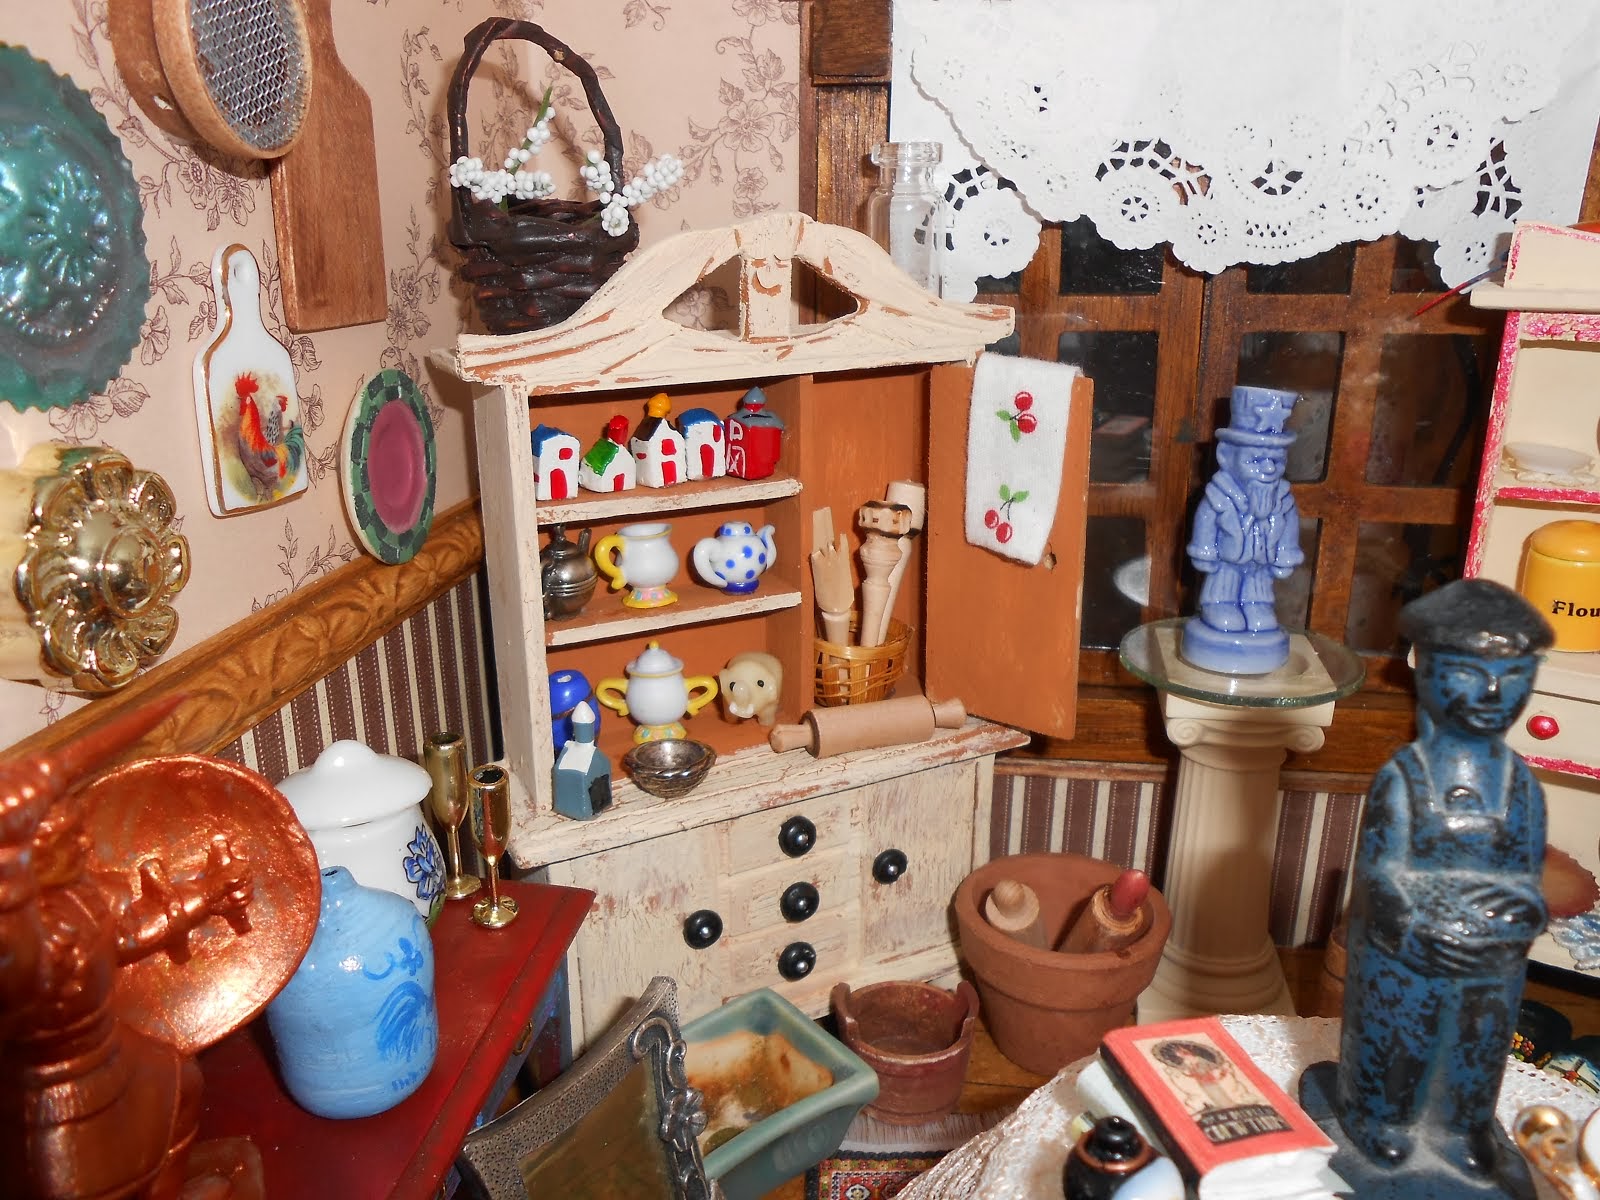
 Second, I want to share the project I spent the day on. I am really happy with how the mixer turned out. It's sculpted from polymer clay with wire beaters. The hutch is a Michael's one that I bashed. I extended the counter, ripped off the door and added bun feet. Then I crackle finished it. I love the aged look you get with that stuff.