Wednesday, November 25, 2015

Let the games begin!

 I spent several hours on the dollhouse today. Removing trim and shutters and such. The wood is very dry and splits very easily. I am hoping to brick the exterior off the house and will replace all the trim.
 The kitchen window over the stove is now smaller.
 This is the current state of the kitchen.
 And here's the living room. The photo  below shows my biggest problem. I don't know what kind of glue was used but it hasn't responded to heat or Goo Gone. The next attempt will involve the palm sander. That helps with the room on the right but I can't get the felt out of the left room. Any and all suggestions will be appreciated. I'm at a loss.

Sunday, November 22, 2015

Lights, Camera,....

 Here's the first of the living room lamps. It's a mix of jewelry findings, beads, and wire. The shade was made from scrapbook paper.
The second lamp is a pole lamp with three lights that can be arranged as needed. Neither lamp works.

It's time to start the renovations. I need to remove all of the windows and replace them. The trim may need to be replaced as well if I can't successfully remove the pieces without breaking them. All rooms get new wallpaper, except for the attic which will have beams. It has such a low ceiling that I'm not sure it can be used for much else other than storage. I may use one wing as a sewing room. The floors need a lot of work, too. Especially the bedrooms that had zebra felt glued down as carpet. I'm hoping a heat gun will help in the removal of the leftover glue.

The exterior is also a mess. The porch trim will have a few alterations to make it look more streamlined. I think I want the exterior finish to be brick. I'm not sure on that yet. So much left to do...I guess I'd better stop typing and get started. :-) Happy new week, my friends!


Saturday, November 21, 2015

It's the little things

 I pried the mirror out of a broken makeup compact this morning. It was the perfect size for the dresser. I mounted it to the dresser so I can rearrange if I want - besides the fact that I haven't started the actual house renovations yet. The zebra carpet has to go.
I made a couple of adjustments to the chair and made a matching ottoman. With this layout I can fit another chair. I need more of the turquoise felt. I think the second chair should be the same style as the sofa. That's the current plan, anyway.

We are in the midst of the first winter storm of the season. We had seven inches of snow an hour or so ago and it's still falling steadily. Hubby and I are enjoying hot drinks and homemade donuts. Yum! We are snug and warm in our home while the beautiful snow falls outside. Life is good and we are blessed.


Friday, November 20, 2015

On to the living room

 The photo was my primary inspiration. I blended it with another style that had the single cushion and tufted back.
 Next was a kidney shaped coffee table in blonde wood with paper clip legs. That's what they were called - paper clip legs. Mine were  made from.....paper clips. Genius, I know, LOL. The box in the back corner is a cake decoration TV. It will be perfect after its makeover.
I still need at least one chair and I have a stepped end table in progress. It's almost time to start the house rehab...not my favorite part but it goes fast once I get started.

Edit: Here's the chair. It's sort of a futuristic wing chair. The step end table is next to it. Now I desperately need to get to the rehab part so the furniture pieces look good.:-)

Thursday, November 19, 2015

Mid Century Modern Fun

 I found this set while looking for inspiration for the master bedroom set. The staggered pulls make it really unusual and interesting. This was the starting point for my mini bedroom set.
 I haven't made nightstands yet and I went with a simple headboard but here are the pieces in the master bedroom - The previous young owner's taste just doesn't quite work, does it? LOL
Here are the pieces in front of the paper that will be in the bedroom. The blonde wood pieces stand out nicely against the stripes. The bedspread is made from the same fabric that Harriet in the boarding house has on her bed. I really like the mini pom pom trim on this one. It really looks like a chenille bedspread!

I'm working my way through the furnishings. After the nightstands I'll be moving on to the living room. Stay tuned....

Monday, November 16, 2015

I have a new webpage!

Hi all! I'm hoping to get back to work on the new dollhouse soon. In the meantime, check out my new web page - De-Lightful Minis.

Have a great day!

Tuesday, November 10, 2015

After the details

 I added some trim to the seats and backs of the chairs and now I am very happy with them. After looking through photos of dinette sets from the 50s I realized that there's no wrong way to make a vintage set. I found round tables with pedestals and some with 4 legs. I found chairs with very thin seats and backs and some that were very plush. The color combinations seem almost endless. That gives a lot of leeway in designing a mini 50s dinette set.
The table will sit in the bay area. Everything will be torn apart, cleaned up, and reinstalled. I will be using different windows, though, as many of the originals are covered in paint splotches. I need to decide for sure what to do about the window over the stove so I can decide what I want in upper cabinets. So many decisions, so little time. LOL

Monday, November 9, 2015

Playing with the layout and something new

 I'm pretty sure this is how the kitchen will look. I'm considering eliminating the window by the stove or at least making it much smaller. There will be upper cabinets, too. The wallpaper will be the one I designed and posted over the summer.
 Davey and his collie in the future cowboy room and bathroom. I am going to wall off the back corner for the bathroom. You will get just a glimpse of the room through the open door. That way I don't even have to worry about a tub or how to deal with the shape of the ceiling back there. I may have a hall but Davey's room will be from the window over either way. I have cowboy wallpaper for this room.
 Here I am starting to sort the room layout and what wallpapers and fabrics I plan to use in each room.
 Today I worked on the dinette set. I found this awesome flat wire at Hobby Lobby. I used it for the legs of the chairs, the table pedestal and metal edging. I am only making three chairs so I can fit the set in the bay area.
Here's one finished chair and the table on the "linoleum" kitchen flooring. I used Triple Thick to give the wood chair seats and backs a vinyl look and feel. I may add a few more finishing details to the chairs once they are dry but I am pleased with the overall effect. I am making progress!

Sunday, November 8, 2015

Kitchen cabinet update

 After doing a bit of refresher research I decided that my "Formica" pattern wasn't busy enough. I added some gray triangles and some more pink ones. I filled in the empty spots with pink splotches.Then I gave the counters a diluted warm white wash to tone the colors down just bit. I touched up the "chrome" edging and reworked the sink faucet. All in all, a very successful project from start to finish. I can't wait to really get started on this house.

Saturday, November 7, 2015

I'm alive, really, and I finally had some time to play!!

I made a bit of progress on some of the furnishings for the 1950s house. I purchased an all white cabinet, stove, and fridge set from a lovely ebay seller. She included some fun accessories, too. More on that later. The appliances were fairly contemporary looking so I started by extending the back of the range and rounding the edges.
 While the glue dried I worked on the little nightstand/dresser for the boy's room. I also blended the wagon wheel color into the bed's color.
 The edges are rounded and now it's time to paint!
 This is part way through the process.
 Here are the finished stove and fridge along with the first of the cabinets.The toaster is really cool, isn't it? I just changed the yellow the seller had painted it to turquoise. The pots were originally red with white speckles. I need to add a clock and other details to the back of the stove and brand labels to both appliances. I'm very pleased with the results.
 Here are all the lower cabinets completed. I need to decide what I want to do about the upper cabinets. This set just has the lower ones.
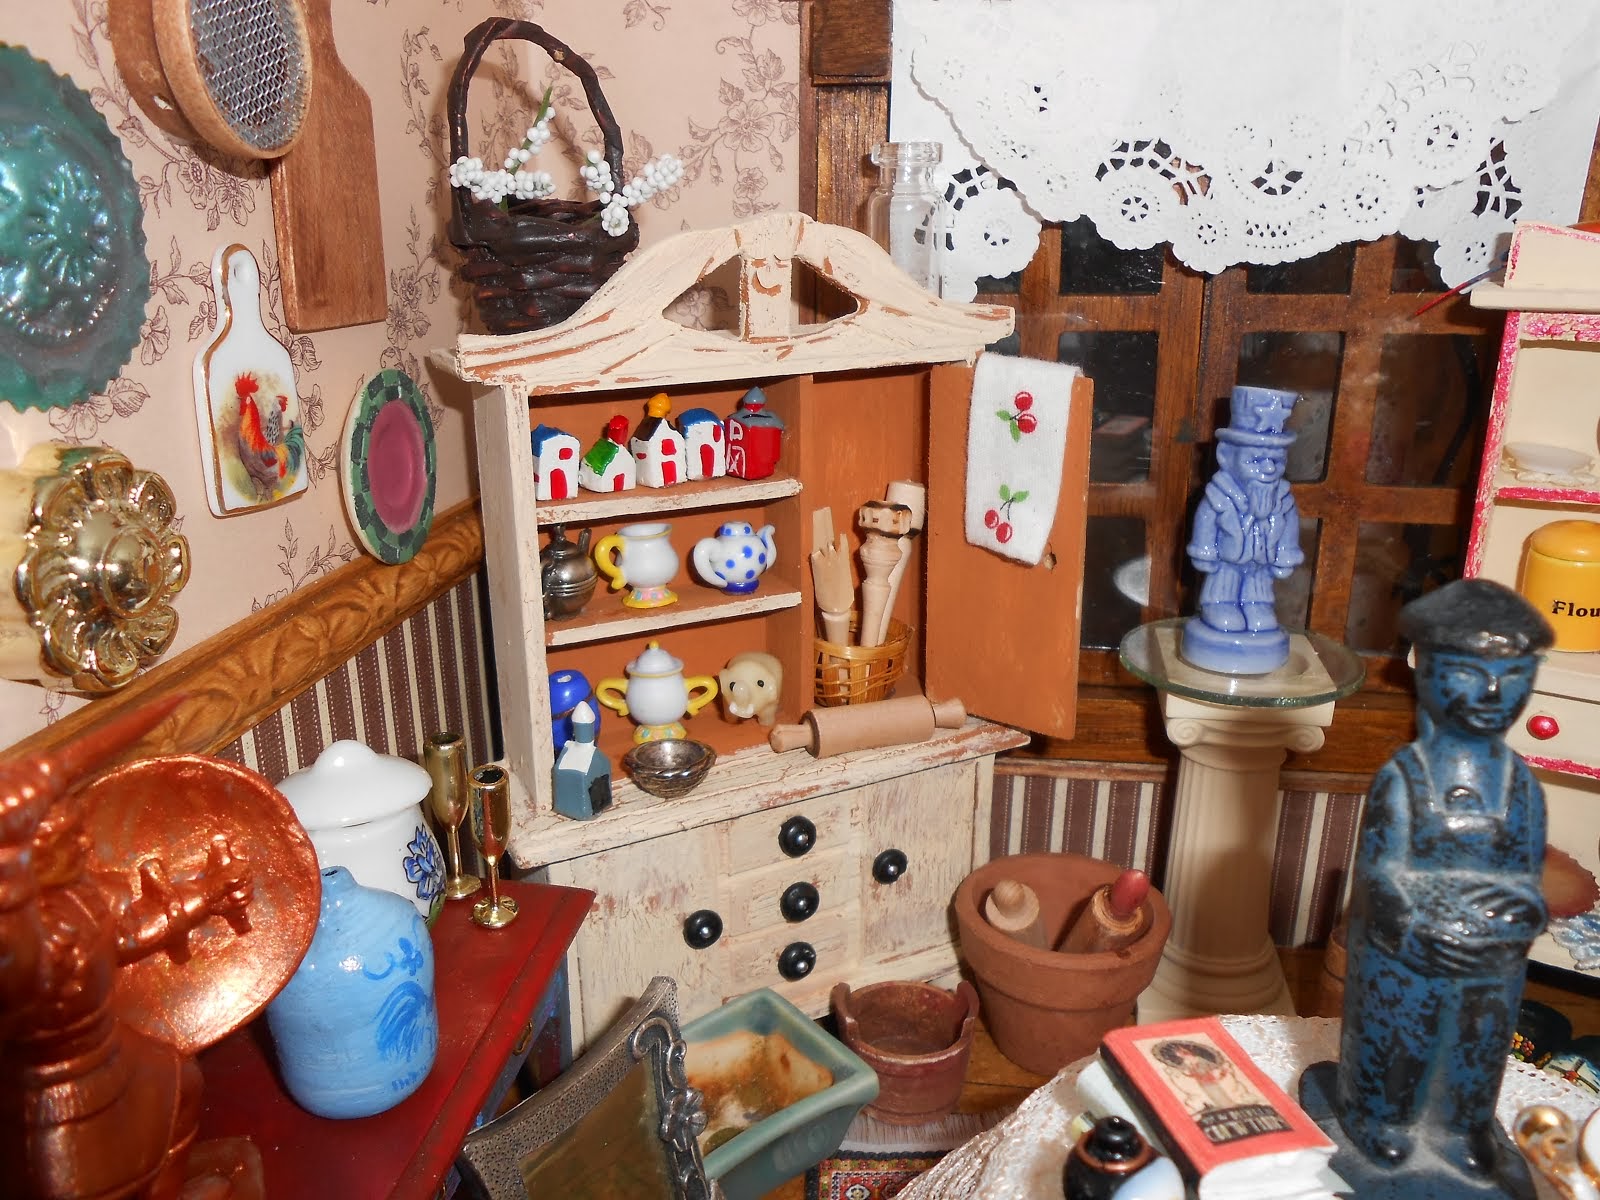
This beauty came from an antiquing trip with my husband. The scale is perfect! I don't know exactly what I'm doing with it yet but planning is half the fun. :-)

I'm sorry I've been away so long. Life just hasn't allowed much time for minis lately. Winter is coming, though. That's when I have the most time to play.