Saturday, December 31, 2016

Mini making with the smallest Little

 Our granddaughters spent a few days with us. The younger one was fascinated by the toy store book box and wanted to make something. So while the older Little went on an adventure with Papa, the younger Little and I made a tiny dollhouse. We started with the medium sized paper mache house from Hobby Lobby. I cut the back off and made the doorway a bit taller and she painted with her colors of choice. She chose all of her sister's favorite colors.
 She drew bricks on the chimney and decorated the roof.

 Then she decided that it was a winter house and we needed snow for the roof. A bit of batting solved that problem. A little golden Cherub ornament adds interest over the doorway - both inside and out.
 I had two vintage 3/4 scale pieces that were slightly damaged. I dressed the bed with the fabric she chose. She painted the interior with pink, purple, and green paints in a freestyle way. She chose leopard print fabric for the carpet. We had so much fun! I had everything on hand so there was no cost to do this project but the memories we made are priceless. <3 p="">

Saturday, December 24, 2016

Wednesday, December 21, 2016

Finally!

 This is the project I told you I'd been thinking about. I turned this Christmas book box into a toy store. Well, the facade of a toy store anyway.
 The cover - I added the store name as a book title on the spine of the book but forgot to get pics of that. I need to take pictures tomorrow when the glue is dry anyway. I couldn't wait that long to share photos tonight.
 My little girl's winter outerwear came from a variety of sources. Her coat was cut down from the suit coat a Victorian gentleman came in. Her boots came with the owner of Then Again Antiques. I cut them down and dressed them up a bit to look more like little girl snow boots. Her hat and scarf started life as one of my socks. I knew I'd find a use for that cute sock with a hole in the heel.
 You can't tell from the photos but the window display is lit up. Inside there's a fireplace and a shelf with dolls and a teddy bear. You can see Santa's boots in the fireplace as he comes down the chimney.
I will try to get better pictures tomorrow. It feels so good to have had some mini time!

Tuesday, December 13, 2016

I'm still here

Hi all. I'm sorry that life got in the way of mini projects and blogging. I have a Christmas mini project percolating in my mind so I hope to have something worth blogging about soon. Thanks to those who checked to see if I was OK. :-)

Friday, June 24, 2016

The finished first house


Barbie house #2

 This house is made of two towers that can be connected with walkways. The rooms are very deep which makes the decorating challenging. I have finished the rooms in the first tower. Both will have rooftop gardens.


This  "pallet" wall was made with scrapbook paper. I found some with four different colors of wood. It looks like four old 2x4s were photographed. I cut the paper into tiny strips, giving a variety of colors and grains. The owner of this dollhouse has a real pallet wall in the house she and her fiance will share after they get married in October.

Sunday, June 19, 2016

Progress on house #1

 The exterior trim is now finished. I need to work on the roof and I may jazz up the porch with a rail.

TThe kitchen got an original art piece.

I divided the upper level into two rooms with a partial wall.  This side has pretty shelves .


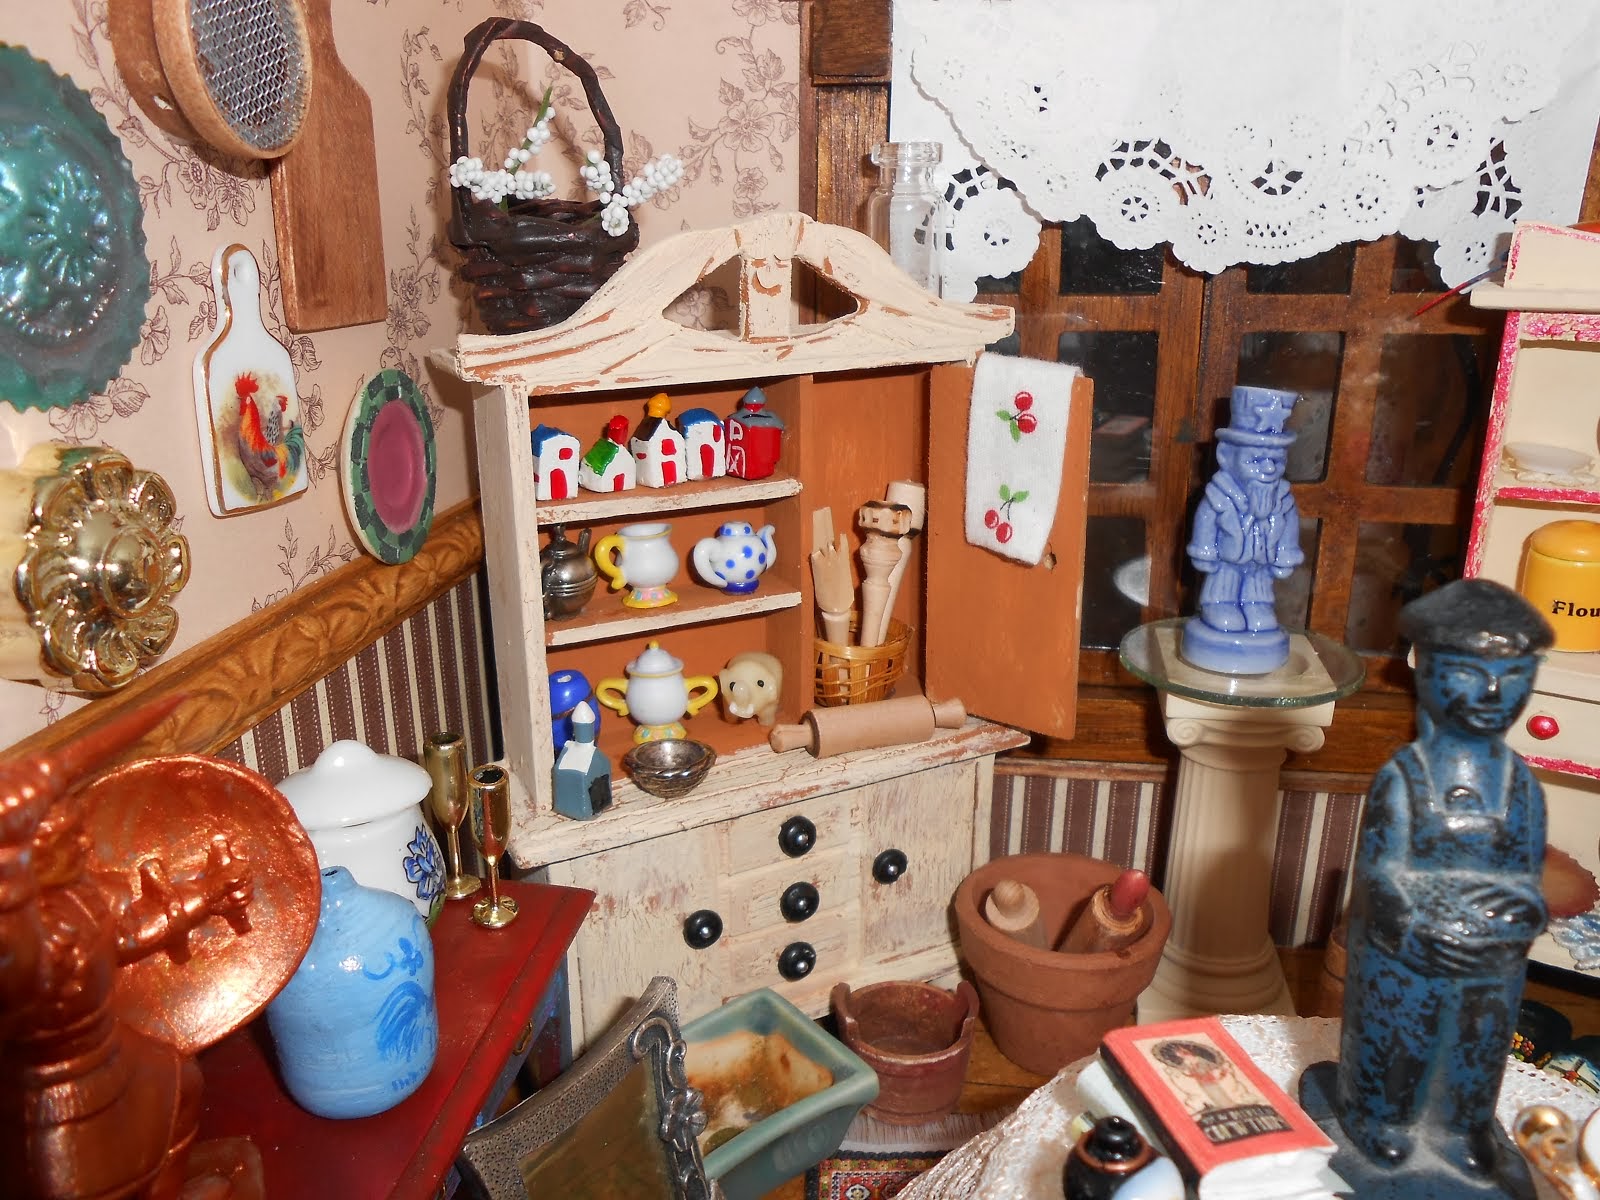
This is the other side of the wall. And here is the rest of the room.  This house will be finished soon and then I will start house #2 which is huge! I'm not really sure what my plan is for it yet. Guess I'd better figure that out soon, lol. Have a great week my friends!

Monday, June 13, 2016

Thinking on a bigger scale...

... literally . I am redecorating two Barbie houses for a friend. Actually, decorating for the first time. The insides and exteriors are painted the same with no trim. Not for long! Dad is hoping his adult daughters will take them once the decorating is done. The first is a two story Colonial. It has two large rooms. I'm planning to add at least a partial wall to the upper level for a bathroom. The lower level is essentially finished.
 I didn't take before pics but it was a box with holes for windows and door. I plan to add a door once I start the exterior.
I added daughter #1's wedding photo. I found some beautiful frames on clearance at Hobby Lobby in the scrapbook section. I am using scrapbook paper for wallpaper. The rug in the living room was one of my coloring pages from last summer while I was recuperating from foot surgery. The border in the kitchen is gift wrapping ribbon.

I am having fun with this....so much that I'm going to redo my middle's Barbie house for the granddaughters for Christmas - with mama's permission, of course.

The second house is huge! It has six rooms, an elevator (that worked when his girls were young), and a rooftop patio. The house is two large sections that are connected with walkways. Those are off now so I can work on the house. It's almost as tall as my entertainment center and is currently taking up quite a bit of my living room, lol.

I have the two houses and a t shirt quilt to make "on commission" this summer. At least I will be busy enough to stay out of trouble, lol. Have a great week, my friends!

Thursday, June 9, 2016

Revisiting the Sherwoods

 My husband and I wandered through an antique shop today on our way home from his doctor appointment. He found a new slide rule to add to his collection (he is a physicist) and I found a new jewelry box for Mrs. Sherwood. It is a pretty little pill box.
I had some time once we got home to play. I found a blog of vintage paper dolls. She had a printie of some accessories for one of the sets she was featuring and it had a record player. I adjusted the size and then added beads and bits for the arm and knobs. I weighted the base with heavy cardboard to keep it upright. I'm pleased with the results. I'm not certain it will stay in the master bedroom but that works for now. :-)

Have a wonderful weekend, my friends!

EDIT: The record player was given a few improvements - the hardware and handle that make it portable and a few albums and 45s. I also shortened the base a bit.

Monday, June 6, 2016

The shadow box house is finished

Lots of little details were added to the living room.

The kitchen just got a potted herb on the window sill .

The bedside lamp got a new shade.


The nursery got a basket of diapers, a diaper pail, and a couple of wall decals.

I made matching console tables with floral arrangements for the upper hall.


Sunday, June 5, 2016

Detail oriented

 I couldn't wait to start on the details. I know what I want to put in the upper hall but I got tired of making furniture so I started on accessories. The kitchen got a new curtain, canisters, and a pan for the stove.
The living room got lamps, a bowl for the coffee table, and some art. I want to make a plant for the floor to the right of the door.

 The master bedroom now has a bedside lamp and a new art piece.
 I changed the valances to more formal drapes. I just didn't like what I first had in here.
 The girl's room and the upper hall got drapes to match the valances that I started with.
The bathroom got necessities like toilet paper and a hand towel.

The details always make a dollhouse look more realistic. I think that's why it's my favorite part of a project. I will finish that upper hall this week, I promise!

Something new and something old

The new -  Today's project was the office. I made a desk, chair, laptop, and file cabinet. The more quarter scale things I make the more fun I am having with this scale.
The old - The kitchen got some attention too. The table and chairs were just too much pattern right in front so I toned them down with some solid black. I also modified the stove just a bit and made the counter look more like granite.

There's only one room left to furnish and then it's on to the really tiny stuff.

Saturday, June 4, 2016

Two more rooms!


 The one thing I don't like about taking photos of the smaller scales is that the imperfections that aren't apparent when you view the scene in person are glaringly obvious in an enlarged photo on the blog. I know that there are plenty of flaws but I am happy with the results, flaws and all. :-)

The photo on the left is of the kitchen. I am so excited about this room! I originally tried to find printies for the appliances but I'm glad I decided to wing it instead. ;-)

The living room furniture turned out much better than I thought it would. I didn't use a tutorial but just played with wood scraps until I found something I liked. Quarter scale will never be my favorite but I am having fun with it for a change. I'm having problems hanging on to the tiny pieces of furniture so I know adding details is going to be a challenge. Wish me luck!

Friday, June 3, 2016

I got a lot done today. All of the furniture was made from bits and bobs I had on hand. The nursery got a new crib and dresser/changing table.
 The bathroom now has all of its fixtures, including the shower doors.
 The girl's room now has a bed, nightstand, and dresser.
 Here's an overall shot of the house so far.
The master bedroom is furnished but the hall/office is not even started.